At the MVP Summit 2015 we had a Hackthon with the guys from the ASP.NET product group to support ASP.NET 5. There were Ideas to improve the documentation, to upgrade samples to the newest beta version or to upgrade older libraries to .NET Core.
It was Albert Weinert who asked me to move LightCore to .NET Core. The more I thought about this idea, the more I liked it. So I decided to move LightCore to .Net Core :)
To change the main library wasn't a big deal. I simply created a new DNX library and added the existing code files to the new libraries. I had to solve only three small issues, which is explained a little later.
The biggest effort was to change all the unit tests from NUnit to Xunit, because NUnit was unfortunately not compatible to .NET Core. While changing the test framework I also changed the assertions to FluentAssertion to be save in the future, if we need to change the the test framework again.
In the new version I did a hard cut with Silverlight and the Compact Framework. I don't want to support this old frameworks. If the .NET core libraries are compatible with that two frameworks, this will only be by accident ;)
This version will support .NET Core 5, UWP10, .NET Framework and Mono. ASP.NET 4.6 and ASP.NET 5 is also supported.
The XAML-Reader is not available in .NET Core, which means the XAML configuration will only work in with .NET Framework. In .NET Core a JSON configuration should be used instead, which is additionally available for all other Frameworks. The configuration by code is still possible and is the recommended way to configure the IoC container.
The old web integration will not be changed, to stay compatible to MVC 3 and 4. This library only uses the new .NET Framework version of the LightCore main library. Additionally we will add a ASP.NET 5 integration to replace the build in IoC with LightCore.
The ThreadSingeltonLifecycle is currently not working in the .NET Core version, because System.Threading.Thread is not available in .NET Core. We need to find another solution to identify the current thread. This live-cycle only works in .NET Framework.
In case of reflection to get the properties to inject, the BindingFlags.SetProperty is not available in .NET Core. This means there are possibly some performance issues, while fetching and validating the property setter.
Another issue is the CommonServiceLocator, because the ServiceLocatorImplBase of the Microsoft.Practices.ServiceLocation is also not yet available in .NET Core. So the CommonServiceLocator is only working with .NET Framework. Maybe it is needed to build an own ServiceLocator.
With the unit tests of LightCore.Configuration we had problems with three tests which were failing, if they are not running individually. This is because the Xunit tests where run in parallel and the RegistrationLoader in LightCore is not ThreadSave. This guy mus not be thread save, but we needed to wrap all tests with an lock statement which are using RegistrationLoader.Instance.Register() to solve that problem.
A public build server is set up with AppVeyor, but we also need to integrate the other libraries into this build.
More ideas
Property injection should only work with an marker attribute to improve the performance
Some users want to have the named instances back in LightCore. I believe we should add this feature again. It is definitely not a nice pattern to use named instances, but as always in the real world we can't use all the nice patterns every time
Call for contributions
As already written, we need to change the web integrations and the samples, documentations and the performance tests, though. You are able to follow the current development process on the related feature branch: https://github.com/juergengutsch/lightcore/tree/jg/portable
It would be pretty cool, if you would contribute some ideas, suggestions and issues directly on GitHub. Please also feel free to send us code contributions via pull requests :)
We would like to make LightCore one of the best IoC containers for .NET Core :)
For LightCore 2.0 I would like to show the build state inside the GitHub repository. I could use my personal Jenkins build server on a Azure VM, because Jenkins also provides the build state, with a plug-in.
But this seems to be the right moment to play around with AppVeyor:
AppVeyor is a browser based SaaS (Software as a Service) application in the cloud. AppVeyor provides many useful features within a pretty simple, intuitive and clean UI. GitHub is completely integrated and it is really easy to create a build job for a GitHub project:
Image may be NSFW. Clik here to view.
The .NET Version Manager (DNVM) is already installed and you only need to figure out which run-time is used by default. I used the build output to see the results of the "dnvm" commands. Finally I choosed the way to install the needed beta-8 with the batch scripts, every time the build starts:
Image may be NSFW. Clik here to view.
dnvm update-self
dnvm install 1.0.0-beta8 -a x86 -r coreclr -OS win
dnvm alias lccoreclr 1.0.0-beta8 -a x86 -r coreclr -OS win
dnvm install 1.0.0-beta8 -a x86 -r clr -OS win
dnvm alias lcclr 1.0.0-beta8 -a x86 -r clr -OS win
For the builds and the tests I also used the batch command mode with the following lines:
Build:
Image may be NSFW. Clik here to view.
cd LightCore
dnvm use lccoreclr
dnu restore
dnu build
Test:
Image may be NSFW. Clik here to view.
cd ..\LightCore.Tests
dnvm use lccoreclr
dnu restore
dnx test
Show the build state
Finally I'm able to copy a small piece of MarkDown code, which I can use in the readme.md file in the GitHub repository to show the current build state:
As you can see, it is pretty simple to use and handle AppVeyor. I'm sure I'll also use AppVeyor for my other open source project, the "SimpleObjectStore". But I need to move that library to .NET Core first. ;)
At the MVP Summit 2015 Albert Weinert told us that ASP.NET has a huge problem: Almost all of our favorite tools are not usable with .NET Core. Many unit test frameworks, IoC containers, almost all mocking frameworks will not work with .NET Core and needs to be moved to DNX libraries to get portable. Additionally almost all mocking frameworks are based on the Castle.Core library, which also needs to be moved to be portable.
Currently I'm working at LightCore to make it compatible to .NET Core, to make the world a little better ;) Hopefully. This needs some steps to do. More details are in a separate blog post about LightCore 2.0. Because the unit tests of LightCore don't use mocking tools this was easier than expected.
With this post I want to tell you, what you need to do to move your library to .NET Core. I will use the 'Simple Object Store' to make a step by step tutorial. At the end my open source library will be compatible with .NET Core :)
But why should I do this? Is this future proof? Does the effort make sense?
At first I need to know that DNX projects (that's the name of the .NET Core libraries) are a kind of portable libraries. The only difference is that portable class libraries building a single assembly and DNX projects creating a NuGet package. All the other stuff is equal. This means the the libraries are compatible to many different platforms and frameworks. If I build a DNX library, I can use this library in .NET Core, .NET Framework, UWP and Mono. This should answer the questions above.
The current state of the Simple Object Store
Currently the solution includes many framework specific projects with linked source files to build against different Framework versions. This needs to be replaced with one single DNX project. I don't want to support frameworks lower than .NET 4.0 (Please tell me if you need a build for a lower version than 4.0.)
That means I have four projects for the SimpleObjectStore and the same number of projects for the AzureStorageProviders. And I have two test projects, one for the main library and one for the providers library.
The goal is to have four different libraries instead of 10.
Step 1: Convert the main library
In the Solution I remove the main library and create a new DNX library with the same name. I need to rename old the project folder before. I Add all the existing code files into the new DNX project After that I need to add the frameworks I want to support and to update the dependencies in the project.json to get the project building.
Step 2: Convert the providers library
To get the AzureStorageProviders library running on .NET Core I have to do exactly the same for as for the main library. Additionally I need to add a reference to the main library. To get the right reference I have to add a dependency to the main project without a version number. (If I would add a version number, the build look for an existing NuGet package on nuget.org)
Step 3: Converting the unit test projects
Currently I'm using NUnit to test the SimpleObjectStore. I need to decide whether to change to Xunit or to use the new NUnit 3.0.0 portable build.
I'll give the new NUnit a try. In the tutorial about using the portable build, they show the way to use a DNX console application to create a test project. I disagree with that. I would like to have a separate DNX console application as a NUnit runner. This should work in the same way as the Xunit runner. I just created it in a separate project.
Because I have the separate runner I can use the same way as in Step 1 to create DNX libraries for the test projects. Additionally I add a reference to the NUnit runner and add a command called test, which runs the Runner and passes the current test library.
"commands": {"test": "nunit.runner.dnx"
}
(I use the NUnit namespace because I want to contribute this runner to the NUnit project. I use it here as a kind of dog-fooding to test the runner.)
If this is done, we need to get this projects compiled. I did this, by try and error, building, fixing, building, fixing, and so on... The old NUnit API is almost equal to the new NUnit 3.0.0 API and there is less to do than expected.
Hopefully this post will help you to make your libraries running on .NET Core and any other platform and framework. As you can see this isn't really a big deal. You need to know some small things about DNX libraries to create packages which are targeting as many platforms as possible. From my point of view, with the new possibilities given by .NET Core it is really important to get ready to go the same way as Microsoft. Prepare your .NET libraries to get also used on Linux and Mac. That's pretty awesome. Have you really thought about that a few years ago? ;)
One of the nicest new features in ASP.NET 5 is the ViewComponent. This is a kind of a 'mini MVC' inside the MVC application which can be used like partial Views. ViewComponents are like partial Views with an own controller, almost comparable with a UserControl in ASP.NET WebForms.
Use cases are multiple reused components of a web application. That means all things that must not be managed by the current controller action. Let's use a Blog as an example, which has some more elements like menus, tag lists, link lists, archive overviews, etc. The data of these elements can be passed via the current actions to the view, but this needs to be done in every single action and produces a lot of duplicate code.
It would be nice if the controller actions only have to do one single task: fetching and passing blog posts to the view. All the other things should be done on other locations, to not mess up the controller actions.
That's where the ViewComponents entering the stage.
Let me show you how ViewCompnents look like
First we need to create a simple class which derives from ViewComponent and which needs to have "ViewCompoennt" as a sufix. E. g. "Top20TagsViewComponent":
public class Top20TagsViewComponent : ViewComponent
{
    private readonly ITagService _tagService;

    public Top20TagsViewComponent(ITagService tagService)
    {
        _tagService = tagService;
    }

    public IViewComponentResult Invoke()
    {
         var tags = _tagService.LoadTop20Tags();
         var models = tags.Select(
            new TagViewModel
            {
                Id = tag.Id,
                Name = tag.Name
            });
        return View(models);
    }
}
The method Invoke almost looks like a Action in a usual Controller, which creates and returns a View. The used TagService is injected with the default IoC. Because is available everywhere in ASP.NET 5, you can access everything what accessible with a usual Controller.
The View is pretty common:
@model IEnumerable<DotNetFn.ViewComponents.TagViewModel>

@if (Model.Any())
{
	<ul>
        @foreach (var tag in Tags)
        { <li>
                [@tag.Id] @tag.Name </li>
        } </ul>
}
Only the location where the View needs to be saved is a bit special. You need to save the default View with the name Default.cshtml in a folder, which is named like the ViewComponent without the suffix inside /Views/Shared/Components/ Our ViewComponent is stored in /Shared/Components/Top20Tags/Default.cshtml
The default name is Default.cshtml, but you can use any other name, if you pass that name to the View:
return View("TheNicerName", models);
With this you are able to switch the Templates inside the ViewComponent, if it is needed.
The described Component will be used almost as a partial View:
@Component.Invoke("TopTags");
Passing arguments
A very interesting thing is to pass arguments to a ViewComponent. Maybe you want to change the number of Tags to display, depending on where we want to use this Component.
We only need to extend the Invoke method with one ore more arguments:
public IViewComponentResult Invoke(int count)
{
    var tags = _tagService.LoadTopTags().Take(count);
    var models = tags.Select(tag =>
        new TagViewModel
        {
            Id = tag.Id,
            Name = tag.Name
        });
     return View(models);
}
Now we able to call the ViewComponent with that additional argument:
@Component.Invoke("TopTags", 10);
Asynchronous ViewComponents
To support asynchronous Views, we can also use a asynchronous Invoke method instead:
public async Task<IViewComponentResult> InvokeAsync(int count)
{
    var tags = await _tagService.LoadTopTags();
    var models = tags.Select(=>
        new TagViewModel
        {
            Id = tag.Id,
            Name = tag.Name
        }).Take(count);
     return View(models);
}
We only need to use await in the View to use this InvokeAsync:
Yesterday, it was something like an announcement day. Let's have a look to the news from Redmond:
Visual Studio 2015 Update 1
This is what the most of us are waiting for: Microsoft released the Update 1 of Visual Studio 2015. There many improvements added to the IDE, with the debugging and navigation. See the detailed description in this blog posts:
This update is also available for TFS 2015 Express.
.NET Framework 4.6.1
Along with the Update 1 of Visual Studio 2015, Microsoft released .NET 4.6.1 with some improvements and big fixes in WPF and SQL Server connectivity, RyuJIT, GC and WCF:
In the summer this year the NuGet Package Manager got an update, which changes the UI completely. This new UI wasn't really intuitive to use and confuses many users.
With the Update 1 of Visual Studio 2015 MIcrosoft also delivers an update of the NuGet Package Manager. Now the UI is pretty much cleaner and easier to understand. There are still some things to do, but if you compare to the previews UI this is much better.
The first thing you will see are the new tabs in the left upper area. Here you can change the list to browse all or all found packages, you can view the installed packages and now you have a clean list of the packages which have new versions available:
Image may be NSFW. Clik here to view.
As you can see, there are the number of updates shown in the third tab. Also the selection of the package source is easily done in the right upper area, where you also able to access the NuGet option:
Image may be NSFW. Clik here to view.
If you take a look at the package list, there is another pretty cool feature. If there is a package found which delivers exactly the same thing as an Bower package does, you will see a small message with a link in it. This message tells you that you should use Bower to install this package. The link opens up the new Bower package manager. Bower is the cool package manager which should be used to add client side libraries to web projects:
Image may be NSFW. Clik here to view.
If you go the updates by clicking the Updates tab, you'll see another nice thing. Now you can update as many packages as you want. You can use a checkbox on the left side of each package to select the packages you want to install. In the past it only was possible to update one or all packages:
Image may be NSFW. Clik here to view.
On the right side of each package in that list, Microsoft added one to two action buttons to quick do something with that package. Depending on which tab you are. You can quick install in the "Browse" tab, quick uninstall on the "Installed" tab or both uninstall or update on the "Updates" tab:
Image may be NSFW. Clik here to view.
The NuGet Package Manager is divided into three areas: The heading area with the tabs, the search, the package sources, a list area on the left with the list of packages and its action buttons and a kind of a summary area on the right where you will see actions and summary information about the currently selected package. The actions are completely are more detailed as with the action buttons in the list. E. g. you are able to update to a specific version, instead of the latest version only. You will see the dependencies, project and license links, descriptions and so on.
Image may be NSFW. Clik here to view.
The only thing what is not really on the right place are the options in the summary area. This is wrong because this options are not specific to the selected package, but some more global. From my perspective this options should be moved to the options dialog:
Image may be NSFW. Clik here to view.
What do you thing? Update your Visual Studio to Update 1 and tell me your opinion about the new UI of the NuGet Package Manager.
Image may be NSFW. Clik here to view.
I'm very happy about this changes, even if I use this tool less than before, because to project.json files in DNX libraries are more comfortable from my point of view. ;)
The first time I played around with pretzel was more than a year ago. Since than I tried to find a new blog system what is flexible, lightweight, what supports offline editing and runs on my favorite hosting platform: On Microsoft Azure. I tried a lot of blog systems and CMS, like Ghost, Wordpress, Umbraco. I also tried to write an own Markdown based blog system. But at the end Pretzel is the system which matches my requirements at most.
Pretzel is a Jekyll like blogging system, which uses the same template engine and the same Markdown syntax. Pretzel adds some additional features like Azure support and a Razor template engine. I use the liquid engine which is also used in Jekyll. Almost like Jekyll it is creating a static website based on that template engine and the Markdown contents.
To work with Pretzel you need to use a console. PowerShell should also work, but I prefer to use cmder
To install Pretzel locally, you just need to use Chocolatey:
choco install pretzel -y
Just a view days ago they released a new version 0.3.0, which is not yet deployed to Chocolatey. I downloaded the latest release and copied the bits to the Chocolatey install folder, which is C:\tools\pretzel\ in my case. This versions contains important big fixes.
After Pretzel is installed you can easily start baking a pretzel blog. Just create a working folder somewhere on your machine cd into that folder and type
mkdir pretzelblog
cd prezelblog
pretzel create --azure
This command creates a new pretzel blog. That argument --azure adds support to bake/compile pretzel blogs directly on a Azure Webiste.
Image may be NSFW. Clik here to view.
The contents of your folder should look like this:
Image may be NSFW. Clik here to view.
That's all to create a new blog. The blog sources, the posts and the templates are inside the _source folder:
Image may be NSFW. Clik here to view.
Now lets show you how it looks like in the browser. To start the blog locally you need to cd into the _source folder taste the Pretzel blog:
cd _source
pretzel taste --drafts
Add the argument --drafts to also see the drafted posts. The command taste starts a small web server listening to localhost:8080 and opens the default browser where you can start using the blog.
If it's all fine you can bake your Pretzel blog
pretzel bake
This command creates a folder called _site inside the inside the _source folder with the compiled blog inside. This is the baked Pretzel blog which is a static website, built with the templates and the posts and pages written in markdown. You can put the contents of this folder to any web server.
Setup the deployment
The idea was to have the blog under Git source control and automatic deploy it to an Azure website. I use GitHub to host the repository and I linked that repository to an Azure website to automatic deploy it every time I push changes to the repository. In the first time I didn't use the argument --azure to create my blog, because the idea was to just push the compiled blog every time I change something or every time I create a new blog post. This means I only had the folder _site under source control. This works really great, because there is nothing special. Only the compiled static web was pushed and deployed.
But this wasn't really a good idea and I had some problems with this:
The Markdown contents and the templates are not under source control
I always need to bake the Pretzel blog before I can push.
Because the Markdown is not on GitHub pull requests are made on the compiled web and I need to merge on GitHub AND locally in the Markdown contents.
Using the argument --azure while creating the Pretzel blog adds a Visual Studio solution and a dummy project to the working folder. The Solution also contains a Visual Studio website project which points to the _site folder. The dummy project contains an empty class and a post build command which just bakes the Pretzel blog:
Every time I push changes to the repository the Azure website pulls the changes, compiles the dummy project, executes that command and than some Azure-Kudu-magic happens: Kudu copies the contents of the website project to the wwwroot folder of the Azure website. It magically does exactly what I want to have. If I call the Azure website within the browser I get the expected result.
In the current version 0.3.0 the argument --azure doesn't work completely correct, because it only copies the pretzel.exe to the working folder. Since they changed the output to deploy also some additional libraries, all the depended libraries also need to be copied to the root:
Image may be NSFW. Clik here to view.
This looks a bit messy, but it works. They need to ILMerge all the libraries or they need to fix the --azure argument
The next step to do is to git ignore the contents of the folder _site and the contents of the folder _drafts if you don't want to publish drafts to a public repository. To ensure the empty folder _site will be deployed to Azure (this is needed to don't get a compile error) I just added the index.html of the compiled web to the repository.
As you can see, it is pretty simple to setup a Pretzel blog. The real work starts now changing the templates to add a nice layout and creating the first blog posts :)
To start a ASP.NET 5 application with MVC 6 from scratch, is a bit annoying because it is much to write and always the same work to do. This is why the new project wizards in Visual Studio are still a good thing. But how do we setup a new project on Linux or Mac where we don't have a Visual Studio? VS Code doesn't have something like such wizards.
In the real world - the parallel universe to ASP.NET development, where another kind of web developers are living - there is a pretty cool tool to scaffold new web projects. And since Microsoft is working on ASP.NET 5, they are opening a door to that parallel universe, by using tools from the other side. NPM, Bower, Gulp, Grunt... all of this guys are well known tools in that parallel universe, but pretty new to the ASP.NET web developers.
"Welcome to the marvellous ASP.NET 5 generator!"
One of this tools is Yeoman. It works almost like the Visual Studio wizards. It is a small but strong tool scaffold all kind of projects. And Microsoft adds support for ASP.NET 5 projects.
You need to have node.js and NPM installed on your machine to install and use Yeoman:
npm install -g yo
npm install -g generator-aspnet
if the installation is done you are able to use the Yeoman aspnet generator even offline:
yo aspnet
Use the argument --grunt to use Grunt instead of Gulp. Yeoman is welcome you to the ASP.NET generator wizard:
Image may be NSFW. Clik here to view.
To select one of the shown templates, you can easily use the arrow keys. For the demos I prefer to use the "Web Application Basic" template out the following:
Empty Application
Console Application
Web Application
Web Application Basic [without Membership and Authorization]
Web API Application
Nancy ASP.NET Application
Class Library
Unit test project
This will create you a basic project, as known as from the new project wizard of Visual Studio 2015. The "Empty Application" will create you a project with a startup.cs, project.json, a dockerfile and a wwwroot folder which only contains readme.md and a web.config.
All of the yeoman templates are including a dockerfile to create a Docker image out of it and to to run the application on Docker:
FROM microsoft/aspnet:1.0.0-rc1

COPY . /app
WORKDIR /app
RUN ["dnu", "restore"]

EXPOSE 5000/tcp
ENTRYPOINT ["dnx", "-p", "project.json", "web"]
I already wrote about setting up Docker on Windows on my German speaking blog. I'll translate it as soon as possible to add this posts here in the new blog.
After you select a template, Yeoman will ask you for a application name:
Image may be NSFW. Clik here to view.
This name will used as the application folder name and the default namespace. It will also be used in the title tag in the layout page. Yeoman will show you what files are created and what to do next to start the application:
Image may be NSFW. Clik here to view.
That's pretty much it. :)
Now you are done setting up your new application and you can start developing using Visual Studio Code or any other tool you want to use.
Additional generators
The Yeoman ASP.NET generator additionally includes many sub generators to create some spacial files, directly in the working directory. For example you can easily create AngularJS controllers, directives, json configs, views, controllers, plan class files. And many other what you maybe needs. To see a list of all sub generators add the argument --help
yo aspnet --help
As you can see, this Yeoman ASP.NET generator and the sub generators are pretty useful to quick setup your ASP.NET project on Linux, Mac and as well on Windows machines.
I just got my Mac-Mini running running again and I wanted to play around with ASP.NET 5. This Mac-Mini is a build server with a Jenkins installed to build Cordova based iOS Apps. After many weeks I didn't access this machine, I had to install a lot of updates and I had to get all the build stuff again. And by the way I also installed and updated some tools to run ASP.NET 5.
To install ASP.NET 5 I used the installer from get.asp.net. This installs the .NET Version Manager (dnvm) and the latest .NET Execution Environment (DNX) for .NET Core and Mono. (If you want to use the command line to install all that stuff, visit docs.asp.net/en/latest/getting-started/installing-on-mac.html.) I also needed to update node.js and NPM and to install Yeoman as described in the last blog post.
The next steps were pretty easy: Using a terminal cd to Documents, create a new folder dev, cd to dev and complete the Yeoman wizard to create a project called "demo01":
cd Documents
mkdir dev
cd dev
yo aspnet
After the project was successfully created, I started to application.
cd demo01
dnu restore
dnx web
Image may be NSFW. Clik here to view.
That works completely without any errors. Do you know that bad feeling, if something works unexpectedly fine on the first try? That's how I felt after I called the web on localhost:5000 in Safari:
Image may be NSFW. Clik here to view.
That's really, really cool :) I really love to have the possibility to run my ASP.NET 5 applications also on Linux Mac.
The real reason I tried .NET Core on Mac is, that I need some extra automation on my build server. For example: Creating a full text index for my Cordova apps is currently done with a Jenkins on a Windows Server machine where the builds for Windows Phone and Android apps are running and currently I copy that full text index to an Azure blob store to use it for the iOS builds. I don't need to transfer the full text indexes to the Mac anymore to build the iOS Apps. The code to create the full text index is written in C# and could be easily moved to a DNX console application to run on every build machine.
DNX libraries are a bit special, there is no project file which handles references. There is no intuitive way to reference libraries and the result of a DNX library is a NuGet package.
A fact is, the a unit test project to test DNX libraries also needs to be a DNX library.
If I'm right, there are currently only two unit test libraries out there, which are supporting .NET Core. This are Xunit which I will show you in this post and and NUnit which is the topic in one of the next posts.
Reference a DNX library
Before we start to unit test, we need to know how to reference another DNX library.
BTW: There are two types of dependencies in a DNX Project, framework/platform specific which are added inside the framework definition and which are only available in that specific framework and global dependencies which will be available for all defined frameworks
Let's create two projects. The first one is the library we need to test and it contains a simple calculation class, with some methods to divide, multiply, and so on. The second project is our unit test project where we need to reference Xunit and our Library to test. We need to add a global dependencies node in the project json where we reference Xunit, the Xunit DNX runner, fluent assertions and our library
Have a look how I referenced our library. If I don't add a version number it looks for a corresponding folder with a project.json inside. This is the way how we need to reference to another library. If the test library is not next to the library to test we need to add the path to the project.json.
BTW: The FluentAssertions which is used here is just a small helper to write nice and readable assert statements.
Writing tests
Writing tests is pretty common. You can use XUnit in the way you ever used it. For example write something like this:
[Fact]
public void Divide10By5ShouldResultIn2()
{
    var expected = 2F;
    var actual = Calculate.Devide(10, 5);

    actual.Should().Be(expected);
}

[Fact]
public void DevideAnyNumberBy0ShouldResultInAnExeption()
{
    Action act = () => Calculate.Devide(10, 0);

    act.ShouldThrow<ArgumentOutOfRangeException>();
}
Running the tests
At first you need to add a new command to your unit test project:
"commands": {"test": "xunit.runner.dnx"
},
This adds the command "test" which calls the Xunit runner. The runner is a DNX console application which gets the current library to test and executes all the unit tests inside.
Once you have compiled your project, you are able to use the unit test explorer in visual studio to run all the tests and to see the test results or you can just press "test" on the run menu in visual studio:
Image may be NSFW. Clik here to view.
Using this, a console window pops up, does anything and closes. You don't see the any results. This guy runs the command you just created in the project.json and you can do it by your own, by using your favorite console.
Just cd to the directory of your test project, ensure you have all dependencies and start the command:
dnu restore
dnx test
This will show you the test results in the console:
Image may be NSFW. Clik here to view.
To create a test report into a file you only need to add the xunit runner arguments to the dnx command. You can just call dnx test tun run the unit test on a build server like AppVayor. On a Jenkins or on TFS you need to create test log which is readable by this systems.
For this blog post I will reuse the Visual Studio solution of the last post. I only added a new test project called "UnitTestDemo.NunitTests" which is a DNX console application.
The test runner
Nunit doesn't yet provide a DNX test runner as it is provided by Xunit, this is why we need to have a console application which can be called via the DNX command. But this is not a big deal and contains only a few lines of code and a little bit of configuration in the project.json. Lets add two new dependencies:
NUntLight is a lightweight NUnit runner implementation and needs to be used to execute unit test libraries. A NUnit test project usually is a DNX console application with a program.cs inside. Let's add some lines of code to the Main method:
public class Program
{
    public static void Main(string[] args)
    {
#if DNX451
        new AutoRun().Execute(args);
#else
        new AutoRun().Execute(typeof(Program).GetTypeInfo().Assembly, Console.Out, Console.In, args);
#endif
    }
}
This method calls the Execute method of the NUnitLigts AutoRun class. If we are running on .NET Core, we need to pass in the console in and out streams and the Assembly which contains the unit tests. On .NET Framework this can be automatically resolved.
Writing test
If this is done we are able to start writing NUnit tests in a usual way:
[TestFixture]
public class DivideTests
{
    [Test]
    public void Divide10By5ShouldResultIn2()
    {
        var expected = 2F;
        var actual = Calculate.Devide(10, 5);

        actual.Should().Be(expected);
    }

    [Test]
    public void DevideAnyNumberBy0ShouldResultInAnExeption()
    {
        Action act = () => Calculate.Devide(10, 0);

        act.ShouldThrow<ArgumentOutOfRangeException>();
    }
}
Excuting the tests
To execute the tests we can go the same way as using Xunit. We only need to use another command:
"commands": {"test": "UnitTestDemo.NunitTests"
},
This calls the program.cs of the current project. All the other things are equal to the Xunit tests. We are able to use the Unit Test Explorer in Visual Studio or we can press the run test button:
Image may be NSFW. Clik here to view.
Using the command prompt we also have to ensure that we have all the dependencies and we need start the command:
dnu restore
dnx test
This will show you the test results in the console like this:
Image may be NSFW. Clik here to view.
As you can see, unit testing DNX libraries is pretty easy. Sure this could be improved a lot, but there's currently no reason not to test the your code ;)
Deploying a web site continuously to an Azure Web App is pretty easy today. Just click "Set up deployment from source control" and select the source code provider you want to use and continue to log-on to your provider and select the right repository.
Image may be NSFW. Clik here to view.
Now you get a new deployment tab in your Azure Web App where you can see the deployment history, including possible deployment errors.
Sure, it is. But only if it is a small website, a small uncritical app or a demo to show the easy deployment to azure. The deployment of this Blog is set up in this way. With this kind of deployment, the build of the application is done on the Azure Web App with Kudu which is working great.
But I miss something here, if I want to deploy bigger and more complex web application.
How can I run my unit tests? What about email notifications on broken build? What if you need some special tasks while or before building the application?
You can add a batch or a powershell file to manipulate Kudu process to do all this things. But there is too much to configure. I have to write my own scripts to change the AssemblyInfos, to send out any email notification, to create test reports and so on. I would write all the things, a real build server can already do for me.
I prefer to have a separate real build server which does the whole job. This are almost all tasks I usually need to do on a continuous deployment job:
I need to restore the packages first to make the builds baster
I need to set the AssemblyInfo for all included projects.
I need to build the complete solution
I need to run the unit test and possibly some integration tests
I need any deployment
a web application to an Azure Web App
a library to NuGet
a setup for a desktop application
I need to create a report of the build and test results
I want to send an email notification in case of errors
I want to see a build history
I want to see the entire build output of a broken build
Dependent on the type of the project there are some more or maybe less tasks to do.
I prefer Jenkins as a build server but this doesn't really matter. Any other real build server can also do this this work.
To reduce the complexity on the build server itself, it only only does the scheduling and reporting part. The only thing it executes is a small batch file which calls a FAKE script. Since a while FAKE gets my favorite build script language. FAKE is an easy to use DSL for build task written in F#. MsBuild also works fine, but it is not as easy as FAKE. I used MsBuild in the past to do the same thing.
In my case Jenkins only fetches the sources, executes the FAKE script and does the reporting and notification stuff.
FAKE does the other tasks including the deployment. I only want to show how the deployment looks like with FAKE. Please see the FAKE documentation to learn more about the other tasks it. There are many examples and a sample script online.
This is how the build task to deploy a ASP.NET app in FAKE looks like
The parameter listed here are MsBuild properties. This all looks like a usual MsBuild call with FAKE and it really is a simple MsBuild call. Only the last four parameters are responsible to deploy the web app.
We need to add a publish profile to our project. To get this you have to download the deployment settings from the web apps dashboard on Azure. After the download you need to import the settings file to the publish profiles in Visual Studio. Don't save the downloaded file to the repository because it contains the publish password. The publish profile will be saved in the web apps properties folder. Just use the file name of the publish profile here, not the entire path. I pass the profile name from Jenkins to the script, because this script should be as generic as possible and should be used to deploy to development, to staging and to production environments.
The publish password is also passed from Jenkins to the FAKE script, because we don't wont to have passwords in the GIT repository.
DeployOnBuild calls the publish target of MsBuild and starts the deployment based on the publish profile.
AllowUntrustedCertificate avoids some problems with bad certificates on Azure. Sometimes MS forgets to update their certificates.
All variables used here are initialized like this:
let buildDir = "./output/"

let buildConf = getBuildParamOrDefault "conf" "Retail"
let buildNumber = getBuildParamOrDefault "bn" "0"
let buildVersion = "1.16." + buildNumber

let publishProfile = getBuildParamOrDefault  "pubprofile" ""
let publishPassword = getBuildParamOrDefault  "pubpwd" ""
To pass any variable from the build server to the FAKE script just change the sample batch file a little bit:
Sure it isn't such easy as the Kudu way, but it is simple enough for the most cases. If the Build needs some more complex tasks, have a look at the FAKE documentation and in the corresponding Git repository. They have a solution for almost all the things to do in a build. But the best thing about F# is, you can easily extend FAKE with your own .NET code written in C#, F#, whatever...
After 8 years being the heads of the INETA Germany, Lars Keller and Karim El-Jed, will leave the INETA Germany. The reason is, that Lars is working for Microsoft Germany since November 1st and he wants to ensure that the INETA will stay independent from Microsoft. Also the co-lead Karim will leave to focus more on supporting his own .NET user group.
This means the INETA needs two new heads and Lars found some new.
Ulrike Stirnweiss will be the new co-lead and I will be the new lead of INETA Germany
I'm pretty proud to work with Ulli to support the German .NET user groups with the Speaker Bureau and with budget to pay travel costs of the registered speakers.
Maybe you read about that INETA North America will quit until the end of the year. At the beginning of November this year, I talked to their lead. It seems the main reason why they will shut down is, that there seems to be no longer a need to support the user groups in this way. It seems the North American user groups and the available speakers are very well connected and they are managing all that stuff by their own.
We will keep the INETA Germany alive and hopefully do a little more to support the German user groups and the German .NET community in general. Also INETA Europe will stay alive with the European Speaker Bureau.
Currently we have some Ideas (and we got a few pretty cool ideas from Lars) to improve the support for the German user groups and make the INETA Germany a little more present in the German .NET community.
In the near term we will keep all the things as they currently are. This also means Ulli will do Karims Job and I do the same stuff Lars did until the end of 2015. Ulli will be responsible for all things around the website, marketing, and so on. I will continue with Lars Tasks, being responsive for the Speakers Bureau, the user groups and the sponsoring.
If you have any feedback about anything to improve, anything you miss, please drop us a short note. Write to hallo@ineta-germany.de, contact us on any channel like Twitter, Facebook and so on.
Thanks
At the End of this post I have to say Thank You:
to Lars and Karim, who did a great job the last 8 years and who will support us in the first few months being a INETA lead. :)
to Torsten Weber who supports us in the back-end, hosting the website, mail servers, and so on. This makes this job a lot easier. :)
to our current top sponsor Microsoft Germany, which is also keeping the Speaker Bureau alive with the annual sponsoring. :)
BTW
If you want to be a sponsor of the INETA Germany to support the German user groups and the German .NET community please drop me a note. I would be happy to send you detailed information about the benefits of being a sponsor of INETA Germany. :)
Yesterday it works and today it don't work. You possibly know that. Usually there are some code changes, if something like this happens. Some days ago there are now code changes, now new libraries referenced. I just didn't work. And I didn't know what happened here.
I got a XmlException which tells me that my application can't parse a XML result because of the DTD:
System.Xml.XmlException: For security reasons DTD is prohibited in this XML document. To enable DTD processing set the DtdProcessing property on XmlReaderSettings to Parse and pass the settings into XmlReader.Create method.
This Exception was thrown deep inside a SharePoint Client library, when my Application wants to query some user information from SharePoint. The SharePoint Context was fine. I lost 3 hours to find out what changed until the last day. I had a second look to some pull request, I checked the Git history and I checked my .NET environment. I also asked the available team members. But it happened only to me. This was pretty confusing and annoying.
There were no relevant code changes from the last day, to the day when this problem happens. But there was another huge difference: At this day I worked at home. The day before I was in the Office in Basel. A team member asked me about that and sends me a Link to a StackOverflow thread, where some other developers almost had the same problems: DTD is prohibited” error when accessing sharepoint 2013/office365 list. All of them wanted to query information from Office 365 and SharePoint Online. One of them got this exception using a WiFi extender. Another one got that because, his ISP (Internet Service Provider) provides a custom error page, if he can't resolve a specific domain.
I started Fiddler, to see what happened here. I don't use a WiFi extender, but at home I use a different ISP than in the Office in Basel.
Sniffing the HTTP Traffic shows me what happened. I had exactly the same problem as the second person on StackOverflow. In my case it was the msoid.[companyname].emea.microsoftonline.com which couldn't be resolved by my ISP:
My ISP provides a feature called "navigation help", which is a custom error page, which includes a web search for the not resolved host header. That means if the ISP can't resolve a domain name (host header) he provides a page which some help to solve the problem. Which is a good feature in general. But the real issue is they send the page with HTTP Status 200 which means it is all fine with the result and the SharePoint client library tries to parse the returning HTML result, but expects a XML result. Exactly this throws that XML Parsing Exception.
Image may be NSFW. Clik here to view.
The guy on stack overflow could solve this, by switching this feature off. I fortunately found a hint on that page of my ISP too, to switch this "navigation help" feature off. And this solves the problem.
Switching it off and restarting the router solves an issue that costs me more than 5 hours.
My application is a web application based on ASP.NET, it will be hosted on Azure. This issue will not happen in production. But if you are developing a client application, which needs to connect to SharePoint Online this could definitely happen, if your users changing the work space (working at home, at a restaurant or somewhere else) to a space with a different ISP, which also provides something like this.
Getting exactly this exception while querying information from SharePoint Online means the returning result is not the expected XML what can only be happen if XML Parser don't get valid XML. The not resolvable host header is not the real problem, because the client library seems to use a fallback in this case. The problem is, that the ISP possibly returns a wrong HTTP Status, if the host header can't be resolved.
There are many discussions out there about to write 'var' or the concrete type, if you declare a variable. Personally since it is possible to use 'var' in C#, I always write 'var' whenever it is possible and every time I am refactoring a legacy application I remember the reasons why it is important to write 'var' instead of the concrete type.
In the last months I worked a lot with legacy applications and had a lot of effort on refactoring some of the codes because of the concrete type was uses instead of 'var'.
Many people don't like 'var'. Some of them because of the variant type in the VB languages. These guys are using C# but they still don't know C# well, because 'var' is not a variant type but a kind of a placeholder for the concrete type.
var age = 37;
This doesn't mean to declare a variant type. This means to tell the compiler to place Int32 where we wrote 'var'. 'var' is simply syntactical sugar, but with many additional benefits.
The other people who don't like 'var' wanted to directly see the type of the variable. (From my perspective they don't know Visual Studio very well.) This guys opinion is, that 'age' could also be a string or a double. Or maybe a Boolean. Just kidding. But it seems they don't trust variable names and assignments.
My thoughts about 'var'
If I read the code, I directly see that 'age' is a numeric. While reading the code, in the most cases, it is not really important to know what type of number it is. But in this case, a integer makes more sense, because it is about an age of something. Writing meaningful variable names is very important, with or without 'var'. But using meaningful names and the concrete type declaring a variable we have a three times redundancy in just three words:
int age = 37;
// numeric number = number
// we know that 'age' is always a number ;)
More cleaner, more readable and with less redundancy is something like this:
var age = 37;
// variable age is 37
I don't read 'var' as a type. I read 'var' as a shortcut for just 'variable'. The name and the assignment tells me about the type.
And what about this?
var productName = _productService.GetNameFromID(123);
Because I trust the names, I know the variable is of type string. (Any kind of string, because it could be a custom implementation of string, but this doesn't matter in this line of code.)
While refactoring legacy code I also found something like this:
In the later usage/reading of the variable name 'product', I'm not really sure about the type of product and I would expect a 'Product' type instead of a string. This is not a reason to use the concrete type, this is a reason to change the variable name instead:
var productName = _productService.GetNameFromID(123);
Because names are strings in the most cases, I would also expect a string.
Let's have a look at this:
var product = _productService.GetFromID(123);
We are able to read a lot out of this simple line:
It is a product
The type could be Product, because we are working with products
It has an ID which is numeric
Hopefully it is true ;) To be sure I can use the best tool to write C# code. In Visual Studio just place your mouse over the keyword 'var' to get the type information. VS knows the information from the return type of the method GetFromID(); That's simple, isn't it?
To see the type information is not a good reason to write the concrete type.
Another reason is readability. Lets have a nested generic type:
Is this really a good and readable solution? What happened if you change the type of the groups from IEnumerable to something else?
Doesn't look this pretty more cleaner and more readable?
var productGroups = _productService.GetGroupedProducts();
I know, it is not always possible to write 'var', e.g. If you don't assign a value, you have to write a concrete type. In method arguments you always have to write the concrete type. A return value always needs to have a concrete type definition, even dynamic is a concrete type definition in this case. ;)
The most important reason to write 'var' is refactoring. To reduce code changes while refactor code, you should use this useful keyword, because it doesn't need to be changed.
Product product = _productService.GetFromID(123);
If we need to change the type of the returning value of the method because of any reason, we also need to change the type of the variable definition. Let's simplify this only a little bit:
var product = _productService.GetFromID(123);
Now we don't need to change anything in this line of code.
On the customer side I had to mask a domain object and it's dependencies with interfaces to simpler do refactorings later on. Extracting the interface wasn't a big deal. But the most code changes are the replacing of the concrete type on the variable declarations. Sure ReSharper helps a lot, but this domain object was used in many different and huge solutions. This couldn't be done in one step. If they would have used 'var' in all possible cases, we would also have reduced the needed code changes a lot.
Conclusion
The keyword 'var' helps you to easier maintain your code, it reduces code changes and redundancies and it makes your code more readable. Use it whenever it is possible. It is not a variant type, it is a shortcut of the concrete type. It doesn't hide type information, because the assignments and the variable name contains the needed information and Visual Studio helps you to know more about the variable if needed.
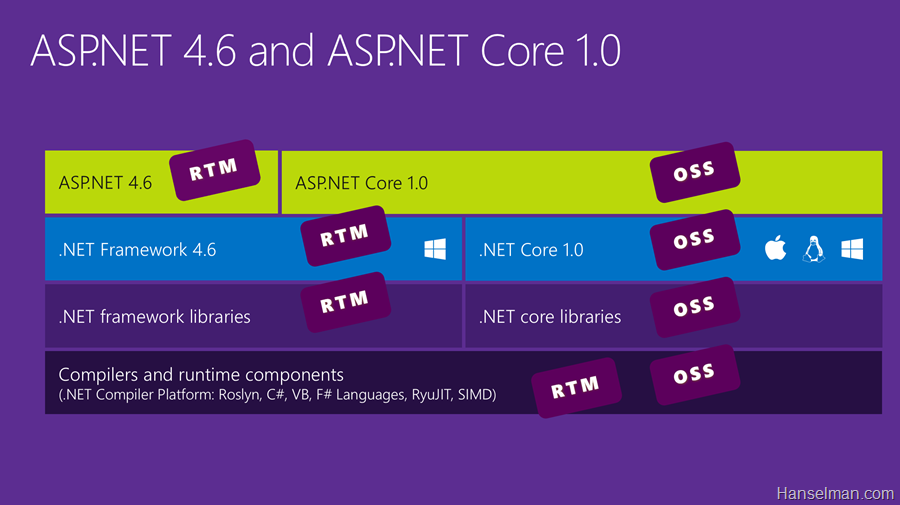
Naming seems to be the hardest thing for software developers, even for Microsoft. ;) There where huge discussions about the naming of ASP.NET vNext at the MVP Summit 2015 and around the world. Now they found the right names for completely new things: Yesterday Microsoft reintroduced ASP.NET Core 1.0 and .NET Core 1.0.
Now they have a lot to do to change all the NuGet packages, library names and version numbers. But from my perspective this is a good change, because all this stuff are completely new things. The .NET Core libraries, .NET core 1.0 and ASP.NET Core 1.0 are completely rewritten and redesigned. The new names and the version 1.0 makes absolutely sense now.
BTW: this also happens to Entity Framework 7, which is now called Entity Framework Core 1.0 or EF Core 1.0.
There is another benefit with that name changes, I think: Now it is possible to update the "classic" ASP.NET 4.6 and .NET Framework to a new version 5.0 in the future without confusing all the .NET developers ;)
The only bad thing about this is, there are too much changes while ASP.NET Core is in RC with a go-live license. This is a little bit critical. This changes should have been done in the beta state.
What do you think about the name and version changes?
In the past I used NBuilder (by Gareth Down) to create test data for my unit tests, demos and UI mock-ups. I really liked NBuilder, I used it for many years and I wrote about it in my old blog (ger) and in the dotnetpro (a German .NET magazine)
Unfortunately NBuilder is not compatible with .NET Core and there was no new release since 2011. Currently I play around with ASP.NET 5 and .NET Core, so compatibility to .NET Core and the latest dotnet platform standard is needed.
Good I attended the MVP Summit 2015 and the Hackaton at the last day, because I heard about GenFu, written by James Chambers, David Paquette and Simon Timms. They used that Hackathon to move this library to .NET Core. I did the same with LightCore at the same event.
GenFu also was a test data generator with some more features than NBuilder. GenFu includes some random data generators to create real looking data.
"GenFu is a library you can use to generate realistic test data. It is composed of several property fillers that can populate commonly named properties through reflection using an internal database of values or randomly created data. You can override any of the fillers and give GenFu hints on how to fill properties."
PM> Install-Package GenFu
To learn more about GenFu, I need to play around with it. I did this by writing a small ASP.NET 5 application which shows us user groups and their meetings and speakers and their topics. I also pushed that application to GitHub. So let me show what I found while playing around:
Setup the project
I created a new ASP.NET Core 1 web application (without the authentication stuff) and added "GenFu": "1.0.4" to the dependencies in the project.json.
After that I created a set of types like UserGroup, Lead, Meeting, Speaker and so on.
E. g. the UserGroup looks like this:
public class UserGroup
{
    public Guid Id { get; set; }
    public string Name { get; set; }
    public string Description { get; set; }
    public IEnumerable<Leader> Leaders { get; set; }
    public DateTime Founded { get; set; }
    public int Members { get; set; }
    public IEnumerable<Meeting> Meetings { get; set; }
}
Using GenFu
Let's start creating a List of user groups to show on the start page. Like NBuilder, GenFu is using a fluent API to create the a single instance or a list of a specific type:
var userGroup = A.New<UserGroup>();

var usergroups = A.ListOf<UserGroup>(20);
The second line of code generates a List of 20 user groups. The DateTime, Guid and String properties are already filled with randomly created values.
Image may be NSFW. Clik here to view.
What I want to have is a list with some more real looking data. The good thing about GenFu is, it already includes some sample data and a pretty cool fluent API to configure the types:
The configuration needs to be done before retrieving the list or the single object. The result now is much better than before:
Image may be NSFW. Clik here to view.
We now have a list of music genre user groups :)
To fill the properties Leaders and Meetings, I created lists before the configuration of the UserGroup and created a extension method on IEnumerable to get a almost random list out of the source list:
Now we can start to create the leaders, speakers, meetings in the same way to get the full set of data. E. g. to get a list of speakers we can also use same methods as to generate the user groups:
var speakers = A.ListOf<Speaker>(20);
Image may be NSFW. Clik here to view.
But wait! Did I really configure the Speakers?
I did not!
I just created the list, but I get well looking names, twitter handles, email addresses and I get a nice phone number. Only the website, the description and the topics list are not well configured. Sure, the names, twitter handles and email addresses don't match, but this is not really important.
This is another pretty cool feature of GenFu. Depending of the property name, it finds the right thing called Filler. We are able to configure the speakers, to assign the Filler we want to have, but in many cases GenFu is able to find the right one, without any configuration.
Just type A.Defaults or GenFu.Defaults to get a list of constants to see what data are already included in GenFu.
Lets extend GenFu to create our own Filler to generate random website addresses. A small look into the EmailFiller shows me how easy it is to create our own PropertyFiller. A string based PropertyFiller can inherit base functionality from the PropertyFiller:
public class WebAddressFiller : PropertyFiller<string>
{
    public WebAddressFiller()
        : base(
                new[] { "object" },
                new[] { "website", "web", "webaddress" })
    {
    }

    public override object GetValue(object instance)
    {
        var domain = Domains.DomainName();

        return $"https://www.{domain}";
    }
}
The first argument we pass into the base constructor is a list of type names of the objects we want to fill. "object" in this case means any kind of type based on Object. In GenFu there are different Fillers to fill the property title, because a person title is a different thing than an article title. Like this you can create different fillers for the same property name.
The second argument are the property names to fill.
In the method GetValue we can generate the value and return them back. Because there already is a EmailFiller which generates domain names too, I reuse the ValueGenerator DomainName to get a random domain name out of GenFus resources.
No we need to register the new Filler to GenFu and to use it:
A.Default().FillerManager.RegisterFiller(new WebAddressFiller());
var speakers = A.ListOf<Speaker>(20);
The result is as expect. We get well formed web addresses:
Image may be NSFW. Clik here to view.
That was pretty easy with only a few lines of code :)
Image may be NSFW. Clik here to view.
In one the first snippets at the beginning of this post, I created an extension method to create a random length list out of a source list. Wouldn't it be better, if we could create a ListFiller to do that automatically? There is already a configuration extension for list properties called WithRandom, but this thing whats to have a list of lists to select a list out of it randomly. I would like to have it a little more different. I would like to have an extension method, where I pass the source list and a min and a max count of list entries:
public static GenFuConfigurator<TType> AsRandom<TType, TData>(
    this GenFuComplexPropertyConfigurator<TType, IEnumerable<TData>> configurator,
    IEnumerable<TData> data, int min, int max)
    where TType : new()
{
    configurator.Maggie.RegisterFiller(
        new CustomFiller<IEnumerable<TData>>(
            configurator.PropertyInfo.Name, typeof(TType),
            () => data.GetRandom(min, max)));

    return configurator;
}
This isn't really a Filler. This is an ExtensionMethod on the GenFuComplexPropertyConfiguration which registers a CustomFilleer to get random data out of the source list. As you can see, I reused the initially created extension method to generate the random lists, but I needed to modify that extension method to use the randomizer of GenFu instead of a separate one:
private static IEnumerable<T> GetRandom<T>(this IEnumerable<T> source, int min, int max)
{
    var length = source.Count();
    var index = A.Random.Next(0, length - 1);
    var count = A.Random.Next(min, max);

    return source.Skip(index).Take(count);
}
I also made this method private because of the dependency to GenFu.
Now I can use this method in the GenFu configuration of the UserGroup to randomly fill the leaders and the meetings of a user group:
This is not really much code to automatically generate test data for your test or the dummy data of your mock-up. Just a bit of configuration which can be placed somewhere in a central place.
Image may be NSFW. Clik here to view.
I think ...
... GenFu becomes my favorite library to create test and dummy data. I like the way GenFu generates well looking random dummy data. GenFu is really easy to use and to extend.
With ASP.NET Core Dependency Injection is now a first class citizen in ASP.NET. All parts of the ASP.NET Stack are using the same DI container. In this post I'm going to show you, how to configure the DI container and how to use it.
Let's first create a new and pretty simple service to use in the examples. As always in my examples it is a CountryService which provides a list of countries. We also need an interface for this service, let's create it too:
public class CountryService : ICountryService
{
    public IEnumerable<Country> All()
    {
        return new List<Country>
        {
            new Country {Code = "DE", Name = "Germany" },
            new Country {Code = "FR", Name = "France" },
            new Country {Code = "CH", Name = "Switzerland" },
            new Country {Code = "IT", Name = "Italy" },
            new Country {Code = "DK", Name = "Danmark" } ,
            new Country {Code = "US", Name = "United States" }
        };
    }
}

public interface ICountryService
{
    IEnumerable<Country> All();
}

public class Country
{
    public string Code { get; internal set; }
    public string Name { get; internal set; }
}
Register the services
We now need to add this ContryService to the DI container. This needs to be done in the Startup.cs in the method ConfigureServices:
This mapping between the interface and the concrete type defines, that everytime you request a type of IContryService, you'll get a new instance of the CountryService. This is what transient means in this case. You are also able to add singleton mappings (using AddSingleton) and scoped mappings (using AddScoped). Scoped in this case means scoped to a HTTP request, which also means it is a singleton while the current request is running. You can also add an existing instance to the DI container using the method AddInstance.
These are the almost complete ways to register to the IServiceCollection:
services.AddTransient<ICountryService, CountryService>();
services.AddTransient(typeof (ICountryService), typeof (CountryService));
services.Add(new ServiceDescriptor(typeof(ICountryService), typeof(CountryService), ServiceLifetime.Transient));
services.Add(new ServiceDescriptor(typeof(ICountryService), p => new CountryService(), ServiceLifetime.Transient));

services.AddSingleton<ICountryService, CountryService>();
services.AddSingleton(typeof(ICountryService), typeof(CountryService));
services.Add(new ServiceDescriptor(typeof(ICountryService), typeof(CountryService), ServiceLifetime.Singleton));
services.Add(new ServiceDescriptor(typeof(ICountryService), p => new CountryService(), ServiceLifetime.Singleton));

services.AddScoped<ICountryService, CountryService>();
services.AddScoped(typeof(ICountryService), typeof(CountryService));
services.Add(new ServiceDescriptor(typeof(ICountryService), typeof(CountryService), ServiceLifetime.Scoped));
services.Add(new ServiceDescriptor(typeof(ICountryService), p => new CountryService(), ServiceLifetime.Scoped));

services.AddInstance<ICountryService>(new CountryService());
services.AddInstance(typeof(ICountryService), new CountryService());
services.Add(new ServiceDescriptor(typeof(ICountryService), new CountryService()));
If you have a lot of services to register, you should create a extension method to the IServiceCollection to keep the Startup.cs clean. The same way is used by default for MVC and many other tools you want to use in your project:
services.AddMvc();
This extension method add all the services to the IServiceCollection which are needed by the MVC MiddleWare.
public static class ServiceCollectionExtensions
{
    public static IServiceCollection RegisterServices(
        this IServiceCollection services)
    {
        services.AddTransient<ICountryService, CountryService>();
        // and a lot more Services

        return services;
    }
}
The method RegisterServices looks now much more cleaner:
The first part after the @inject directive defines the interface. The second part is the name of the variable which holds our instance.
To inject a service globally into all Views, add this line to the _ViewImports.cshtml. In a complete new ASP.NET Core project, there is already a global injection defined for ApplicationInsights:
You are able to use DI almost everywhere in your application (Except in HtmlHelpers, because this are extension methods.) and you can use every servce which is registered in the IServiceCollection, even the services which are registerd by ASP.NET Core. This also means all the contexts, all the environment and even the logger. This helps a lot to keep a ASP.NET Core application clean, leightweight, maintainable and testable.
Currently there are many ways to extend or to organize your Razor views in ASP.NET Core MVC. Let us start with the very basics and let us go to the more complex ways. If your are familiar with previous ASP.NET MVC Frameworks you'll definitely know most of this. But almost all of that "old" stuff is still possible in ASP.NET Core MVC. Some of them listed below shouldn't be used anymore and some of that stuff is completely new in ASP.NET Core MVC. With this post I'm going to try to write down all options to organize and extend MVC Views.
#1: Typed Views
A very basic View without any dynamic stuff is not very common. Even in Visual Studio it is not really visible, because you usually get a running per-configured web, if you start a new project. It is simply a HTML page with *.cshtml as the file extension. You can use Razor syntax, HtmlHelpers and UrlHelpers here to make your HTML code more dynamic. You can use the ViewBag Object or the ViewData collection to pass Data from your Controller action to your View. But this data are not typed and you don't really know whether the data exist in this list or what type the data are.
To use typed date in your view, you need to define a model to use in your view.
This is pretty common for ASP.NET MVC developers, even the next topic is a known and pretty basic way:
#2: Layouts
Almost equal to the MasterPages in ASP.NET WebForms, there is a central way to define the basic layout of your Razor view. This is done with a _Layout.cshtml, which is located in the Views\Shared\ folder. This file usually contains the HTML header, body tags and all the things which are shared between all of your Views.
You can also nest layout views to have a basic layout and different per area on your web site. To use a Layout you need to call it by its name without the file extension:
@{
    Layout = "_Layout";
}
This call needs to be in the first lines of your views. But you don't need to define the Layout in every view, if you already have defined a default Layout. This is already done, if you start a new ASP.NET Core project in Visual Studio. There is a _ViewStart.cshtml in the Views folder where the default Layout is set-up.
Inside the _Layout.cshtml there is a mothod callRenderBody(), which calls the rendering ov the current view at this location:
@RenderBody()
Place this method call at that location where where your view should be rendered.
#3: Sections
Sometimes you need to create HTML code in your view, which should be rendered on another location than the main parts of the view. This can be done with Sections. Sections are named areas in your view and usually used to put JavaScripts from your views in to a separate location, e.g. at the end of the page.
To define a section for some JavaScripts just call the Section you want to render somewhere in the _Layout.cshtml:
@RenderSection("scripts", required: false)
With the flag required you are able to define whether the sections is needed or optional. Now you can use the section in your view:
@section scripts
{<script>
        $(function() {
            // some more js code here;
        });</script>
}
If you use nested layouts, you probably need to nest this areas. This means you need to call the RenderSection() inside a Section:
To reuse parts of your views you can extract this parts and put it into a new Razor view. This view doesn't have an own Action in the controller. This thing is called a PartialView. A PartialView should be placed in the same folder as the View which uses the PartialView or even in the Views\Shared\ folder.
A PartialView can also be a typed view (but don't have to) to get data from the parent View:
@model IEnumerable<UserModel>
@if (Model.Any())
{<ul>
        @foreach (var user in Model)
        {<li>@user.FullName</li>
        }</ul>
}
This PartialView needs a list of users from the parent view
If your PartialView doesn't have a model defined, you don't need to pass the second parameter.
#5: ViewComponents
This is new in ASP.NET Core
Sometimes you need to have something like PartialView, but with some more logic behind. In the past there was a way to use ChildActions to render the results of controller actions into a view. In ASP.NET Core MVC there is a new way (which I already showed in this post about ViewCmponents) with ViewComponents. This are a kind of mini MVC inside MVC, which means they have an own Controller, with an own single action and a view. This ViewComponents are completely independent from your current view, but also can get values passed in from your view.
To render a ViewComponent you need to call it like this:
@Component.Invoke("Top10Articles");
Please have a look at my previews post about ViewComponent to learn how to create your own.
#6: HtmlHelpers
You can extend the Razor syntax by creating your own extension methods on the HtmlHelper class:
public static class HtmlHelperExtensions
{
    public static HtmlString MyOwnHtmlHelper(this HtmlHelper helper, string message)
    {
        return new HtmlString($"<span>{message}<span>");
    }
}
This is pretty useful to create reusable parts of your view, which includes some more logic than a PartialView. But even better than HtmlHelper extensions are the new TagHelpers. HtmlHelpers are still a valid option to extend your Views.
#7: TagHelper
This is pretty new in ASP.NET Core.
This little helpers are extensions of your view, which are looking like real HTML tags. In ASP.NET Core MVC you should use this TagHelpers instead of the HtmlHelpers because they are more cleaner and easier to use. Another huge benefit is Dependency Injection, which can't be used with the HtmlHelpers, because the static context of extension methods. TagHelpers are common classes where we can easily inject services via the constructor.
A pretty simple example on how a TagHelper could look like:
[TargetElement("hi")]
public class HelloTagHelper : TagHelper
{
    public override void Process(TagHelperContext context, TagHelperOutput output)
    {
        output.TagName = "p";
        output.Attributes.Add("id", context.UniqueId);

        output.PreContent.SetContent("Hello ");
        output.PostContent.SetContent(string.Format(", time is now: {0}",
                DateTime.Now.ToString("HH:mm")));
    }
}
This guy defines a HTML Tag called "hi" and renders a p-tag and the contents and the current Time.
Usage:
<hi>John Smith</hi>
Result:
<p>Hello John Smith, time is now: 18:55</p>
ASP.NET Core MVC provides many built in TagHelpers to replace the most used HtmlHelpers. E. g. the ActionLink can now replaced with an Anchor TagHelper:
@Html.ActionLink(“About me”, “About”, “Home”)
The new TagHelper to create a link to an action looks like this:
The result in both cases is a clean a-Tag with the URL to the about page:
<a href=”/Home/About”>About me</a>
As you can see the TagHelpers feel more than HTML and they are easier to use and more readable inside the Views.
#8: Dependency Injection
This is new in ASP.NET Core too.
The biggest improvement to extend your view is dependency injection. Yes, you are able to use DI in your View. Does this really make sense? Doesn't it mess up my view and doesn't it completely break with the MVC pattern? (Questions like this are currently asked on StackOverflow and reddit)
I think, no. Sure, you need be careful and you should only use it, if it is really needed. This could be a valid scenario: If you create a form to edit a user profile, where the user can add its job position, the country where he lives, his city, and so on. I would prefer not to pass the job positions, the country and the cities from the action to the view. I would prefer only to pass the user profile itself and I only want to handle the user profile in the action. This is why it is pretty useful in this case to inject the services which gives me this look-up data. The action and the ViewModel keeps clean and easy to maintain.
Just register your specific service in the method ConfigureServices in the Startup.cs and use one line of code to inject it into your view:
No you are able to use the ContryService in your View to fill a SelectBox with list of countries.
I wrote more about Dependency Injection in ASP.NET Core this posts).
#9: Functions
I never used functions in real ASP.NET MVC projects. I only used it with a the razor engine in an Umbraco web. Anyway, this is another possibility to extend your views a little bit. Maybe you have some a more complex view logic, in this case you can write C# methods in an functions area inside your view:
Last but not least, there is a separate razor file you can use to configure some things globally. Use the _ViewImports.cshtml to configure usings, dependency injections and many more which should be used in all Views.
Conclusion
There are many ways to extend our views. some of them are known from previous MVC versions and some of them are new. Some of them shouldn't be used anymore because there are new or better ways. But you are free to decide which feature you want to use to get your problems solved.
Did I forget something? Please drop me a comment, to tell me what I need to add. If you miss something what you used in previous MVC versions, this is possibly not longer working in ASP.NET Core MVC (e.g. ChildActions). Anyway, feel free to ask me :)
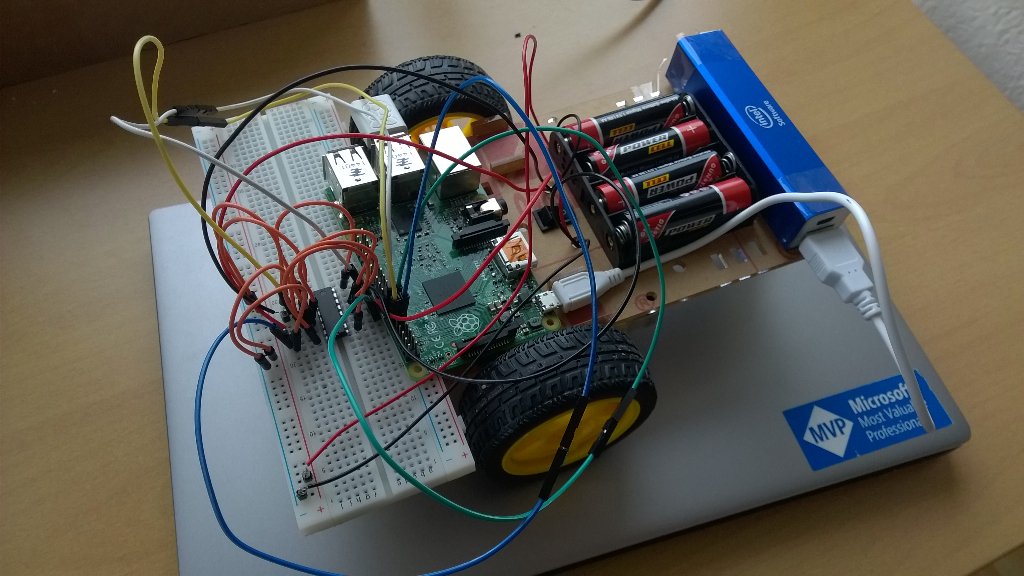
In the last few months a started a small project with the kids. We wanted to create a car, which can be remote controlled via Wifi and a smart phone.
We bought a 2 wheel drive robot car chassis kit to get two motors, a chassis and a battery pack. This kit also includes a small switch and a rotatable stabilizing wheel. To steer the car it is pretty much easier to control two wheels with two separate servos.
I already had a L293D stepper motor driver, some jumper cables and a prototyping board to connect all that stuff. The good thing about the L293D is, that I can control two servos separately.
Image may be NSFW. Clik here to view.
The L293D is pretty cool, because each side can control one servo. The outer pins connects to the power for the servos. In our case the battery pack with 6V. The two inner pins are going to the ground. The pins left and right from the inner pins need to be connected to the servos and the other two pins (RA0 to RA3) are connected to the Raspberry PI. This pins are used to control the servos.
sending a high to RA0 (on GPIO 23) moves the right wheel forward
sending a high to RA1 (on GPIO 22) moves the right wheel backward
sending a high to RA2 (on GPIO 18) moves the left wheel backward
sending a high to RA3 (on GPIO 17) moves the left wheel forward
Setting all the jumpers, connecting all to the RPI and the battery pack and it looks like this:Image may be NSFW. Clik here to view.
I use a small power pack to get the right power (5V) for the Raspberry PI. I use the battery pack for the servos and the power pack for the RPI.
Let me introduce Rollie :)
Image may be NSFW. Clik here to view.
To control the servos and to provide the remote control, we decided to use Windows 10 IoT, because it was simpler to setup the Wifi connection in the RPI. To setup Windows 10 IoT on a SDCard please follow the getting started guide on https://ms-iot.github.io/content/en-US/GetStarted.htm
To setup Windows 10 IoT on the PI, we needed to connect the PI on a screen and to connect a keyboard and a mouse. I followed the setup steps on the screen and configured the Wifi connection. (BTW: I use the original Raspberry Pi Wifi Adapter) If this is done the RPI will automatically connect to the configured WiFi and we don't need the screen, the keyboard and the mouse anymore.
Controlling the car
My idea was to provide a simple web page with the UI on it. This website should send commands to the PI via a simple Web API. Also the web page should be hosted on the RPI
Image may be NSFW. Clik here to view.
Pressing a button should start the servo and releasing the button should stop the servo. The red "Stop"-button is something like a emergency stop while developing and will be removed later on.
Providing a Web API and the static web page was a bit challenging with the first tries, but I found a small library which helps a lot. It was Restup by Tom Kuijsten. Unfortunately this library didn't work with the Windows IoT Core Background Application, but a Universal Blank App works pretty fine. Restup is available as a NuGet package. I use version 1.0.0-beta2:
PW> Install-Package Restup -Pre
I created a new blank app and named it RollieServer. I added some code to initialize and start the HTTP server in the Page_Loaded method of the MainPage:
private async void Page_Loaded(object sender, RoutedEventArgs e)
{
    await InitializeWebServer();
}

private HttpServer _httpServer;
private async Task InitializeWebServer()
{
    // creating the http server
    var httpServer = new HttpServer(5000);
    _httpServer = httpServer;

    // register the api controller
    var restRouteHandler = new RestRouteHandler();
    restRouteHandler.RegisterController<RollieController>();

    // provide the web api
    httpServer.RegisterRoute("api", restRouteHandler);
    // provide the web ui
    httpServer.RegisterRoute(new StaticFileRouteHandler(@"Web"));

    // starting the http server
    await httpServer.StartServerAsync();
}
I don't care about the XAML code of the page, because I don't need any UWP UI directly on the PI.
The StaticFileRouteHandler is pretty cool: I just needed to create a folder called "web" in the project folder. After that I was able to place a index.html page with the web UI in that folder. I also added a small CSS file and jQuery to that folder.
The RestRouteHandler registeres the RollieController to the HttpServer. Additionally the controller will be registered to the route /api/. Inside the Controller we use AttributeRouting to map the Actions to the specific routes:
In this case we have the sub route /rollie/. wheel specifies the right or the left wheel. direction can be forward, backward or off and the last option rnd is only used to call the API with a unique number to disable the cache. The url could look like this:
/api/rollie/left/forward/130981203
The logic
The RollieController provides the web API to control the servos. The controller initializes the RollieMachine which uses two Engines. One Engine per servo to control:
[RestController(InstanceCreationType.Singleton)]
public class RollieController
{
    private readonly RollieMachine _rollie;
    public RollieController()
    {
        _rollie = new RollieMachine(
            leftEngine: new Engine(forwardPin: 23, backwardPin: 22),
            rightEngine: new Engine(forwardPin: 17, backwardPin: 18));
    }
I pass in the GPIO pin numbers to use, into the engines.
In the API action I decided not to call specific methods of the RollieMachine to move the wheels direcly, but to set states of the Machine to move it afterwards depending on the states:
[UriFormat("/rollie/{wheel}/{direction}/{rnd}")]
Response Wheel(string wheel, string direction, string rnd)
{
    var stateChanged = false;

    if (wheel.Equals("left"))
    {
        _rollie.LeftState = EngineState.Off;

        if (direction.Equals("forward"))
        {
            _rollie.LeftState = EngineState.ForwardOn;
            stateChanged = true;
        }
        else if (direction.Equals("backward"))
        {
            _rollie.LeftState = EngineState.BackwardOn;
            stateChanged = true;
        }
        else if (direction.Equals("off"))
        {
            _rollie.LeftState = EngineState.Off;
            stateChanged = true;
        }
    }

    if (wheel.Equals("right"))
    {
        _rollie.RightState = EngineState.Off;
        if (direction.Equals("forward"))
        {
            _rollie.RightState = EngineState.ForwardOn;
            stateChanged = true;
        }
        else if (direction.Equals("backward"))
        {
            _rollie.RightState = EngineState.BackwardOn;
            stateChanged = true;
        }
        else if (direction.Equals("off"))
        {
            _rollie.RightState = EngineState.Off;
            stateChanged = true;
        }
    }

    if (stateChanged)
    {
        _rollie.Move();
    }

    return new GetResponse(
        GetResponse.ResponseStatus.OK,
        new DataReceived { Wheel = wheel, Direction = direction });
}
The call of the method Move() triggers the RollieMachine to do its job:
public void Move()
{
    MoveLeft();

    MoveRight();
}

private void MoveLeft()
{
    if (LeftState == EngineState.Off)
    {
        _leftEngine.Off();
    }
    else if (LeftState == EngineState.ForwardOn)
    {
        _leftEngine.Forward();
    }
    else if (LeftState == EngineState.BackwardOn)
    {
        _leftEngine.Backward();
    }
}

private void MoveRight()
{
    if (RightState == EngineState.Off)
    {
        _rightEngine.Off();
    }
    else if (RightState == EngineState.ForwardOn)
    {
        _rightEngine.Forward();
    }
    else if (RightState == EngineState.BackwardOn)
    {
        _rightEngine.Backward();
    }
}
The RollieMachine is only a sort of a controller class, which is handling states and triggers the engines to move in the tight direction. Lets have a look into the Engine class. To talk to the GPIOs of the Raspberry PI you need to add a reffernce to Windows IoT Extensions for the UWP to your project. This library should already be available on your machine and helps you to use the GPIO pins of your Raspberry PI, Arduino, or whatever is supported by Windows 10 IoT.
The Engine first needs to initialize the GPIOs (aka Pins). We need two pins, one to move the servo in the forward direction and one to backward:
internal class Engine : IDisposable
{
    private readonly int _forwardPin;
    private readonly int _backwardPin;

    private GpioPin _forwardGpio;
    private GpioPin _backwardGpio;

    public Engine(int forwardPin, int backwardPin)
    {
        _forwardPin = forwardPin;
        _backwardPin = backwardPin;

        InitGpio();
    }

    private async void InitGpio()
    {
        var gpio = await GpioController.GetDefaultAsync();

        if (gpio == null)
        {
            _forwardGpio = null;
            _backwardGpio = null;
            return;
        }

        _forwardGpio = gpio.OpenPin(_forwardPin);
        _backwardGpio = gpio.OpenPin(_backwardPin);

        _forwardGpio.Write(GpioPinValue.Low);
        _forwardGpio.SetDriveMode(GpioPinDriveMode.Output);

        _backwardGpio.Write(GpioPinValue.Low);
        _backwardGpio.SetDriveMode(GpioPinDriveMode.Output);
    }
In the method InitGpio() we need to get the GpioController to access the Pins. After some simple null handling I open the Pins with the passed in pin number. I also need to configure the pins as output pins and I write a Low to the output to ensure not to send anything.
With the next four methods I really control the servos:
// ensure to stop the servos and dispose the pins:
public void Dispose()
{
    Off();
    _forwardGpio?.Dispose();
    _backwardGpio?.Dispose();
}

// stop all servos:
public void Off()
{
    _forwardGpio?.Write(GpioPinValue.Low);
    _backwardGpio?.Write(GpioPinValue.Low);
}

// stop all servos and start moving forward
public void Forward()
{
    Off();
    _forwardGpio?.Write(GpioPinValue.High);
}

// stop all servos and start moving backward
public void Backward()
{
    Off();
    _backwardGpio?.Write(GpioPinValue.High);
}
It is pretty much important not to send Highs to both pins in the same time. This could kill the servo, the L293D or at least the RPI. This is why I always sent Low to all the pins, before sending a High to one of them.
The web UI
Shame on me, but the first draft of the web UI is using a layout table to place the buttons and I also use jQuery to control the buttons and to call the API. I will improve this in the future, but this is a small project with the kids and I can't write too much boring code with the Kids, who want to see a driving robot as a cool results. (The Kids are like customers, who want to see results instead of nice looking code)
All the buttons are controlled with jQuery, which is also used to call the API:
$(function () {
	var leftForward = $('#fl');
    var rightForward = $('#fr');
    var leftBackward = $('#bl');
    var rightBackward = $('#br');

    var stop = $('#stop');

    var send = function (wheel, direction) {
        var now = Date.now();

        var url = '/api/rollie/' + wheel + '/' + direction;
        url += '/' + now;

        console.log('do: ' + url);
        $.get(url, function () {
            console.log('done: ' + url);
        });
    };

    leftForward.bind('mousedown', function () {
        send('left', 'forward');
    });
    leftForward.bind('mouseup', function () {
        send('left', 'off');
    });

    rightForward.bind('mousedown', function () {
        send('right', 'forward');
    });
    rightForward.bind('mouseup', function () {
        send('right', 'off');
    });

    leftBackward.bind('mousedown', function () {
        send('left', 'backward');
    });
    leftBackward.bind('mouseup', function () {
        send('left', 'off');
    });

    rightBackward.bind('mousedown', function () {
        send('right', 'backward');
    });
    rightBackward.bind('mouseup', function () {
        send('right', 'off');
    });

    stop.bind('mouseup', function () {
        send('right', 'off');
        send('left', 'off');
    });
});
With this code, everytime I press a button, the specific wheel will roll. And if I release the button, the wheel stops rolling.
If the app is deployed and running on the RPI I can use the browser on my smartphone to call the web page:
http://192.168.2.58:5000/index.html
To get the right IP address of yuor RPI, you should use the Windows IoT Core Watcher. This guy shows the Windows 10 IoT devices in your network and it displays the addresses, the online states and so on:
Image may be NSFW. Clik here to view.
You also need to now the IP to deploy the app to your RPI with Visual Studio 2015.
Deployment
I used Visual Studio 2015 to deploy to the Raspberry PI. This is pretty easy if you know the way to do it ;-)
Choose "ARM" as solution platform and Remote Machine as the target. The first time you choose the Remote Machine, the Remote Connections dialog will open. Type in the IP address of your PI and choose the authentication mode Universal. Click select and you are now able to deploy via F5 or via right click and deploy in the context menu of the current project.
Image may be NSFW. Clik here to view.
To change the Remote Machine settings, just go to the debug settings and reconfigure the settings. I had to change the configuration because I chose the wrong authentication at the first time I tried to deploy:
Image may be NSFW. Clik here to view.
Conclusion
This is just the first step to build a small robot. Now it is a remote controlled car. The next step is to add a camera and to stream the video to the web UI on the smart phone. We additionally want to add some more sensors and to get this thingy more and more self controlled. :-)
Initially I wanted to use Node.js on a Rasbian OS, to learn more about Node.js. But it took too much time to configure the system to automatically connect to the WiFi and it got more and more boring for the Kids.
Switching to Windows 10 IoT was pretty fast and C# and Visual Studio are well known tools. Only the deployment and development flow is pretty much faster and easier using Node.js, because I can work directly on the RPI using Vi or Nano via a SSH terminal. Anyway, now I will continue working with Windows 10 IoT and Visual Studio 2015.